Creating Your Website
This section assumes that you have already prepared the digital images of your artwork and know what information you would like displayed on your website. More information about that is given in Preliminary Preparation.
We have tried to make creating your website is easy as possible and the instructions on the screens should be fairly intuitive and self explanatory. The information given below is just here to describe the steps involved. But the best way to find out is to try it out for yourself by taking advantage of our free 14 day trial.
You will first need to login* to the Websites for Artists home page. (You will have been sent your login details when you registered with us). This will automatically take you to your Websites for Artists Maintenance Screen. From this page you can create your website. When creating your website, a copy will automatically be created on the Websites for Artists website. Once your are happy with it, it can be published to your own website by clicking on the “PUBLISH” button (Step 4 on the Website Maintenance Screen).
STEP 1 - Select your website styles
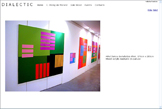
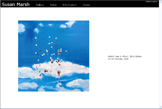
See the Examples and choose the website style you would like. Possible options are
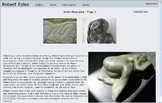
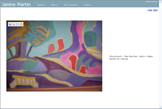
- Horizontal header and vertical images
- Horizontal header and horizontal images
- Vertical header and horizontal images
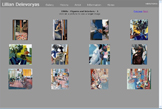
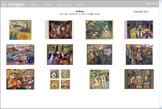
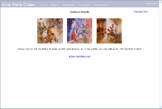
Then choose the gallery style you would like. See the Examples. Possible options are
- Images displayed in a table
- Images displayed as a slideshow
As with all changes that you make to your website you must click <Save Changes>
You can also choose the colours for the header and the background of your website.
Once you have created your website you can amend any of these options, without having to re-enter your images and text.
STEP 2- Upload your images from your computer to your area on Websites for Artists
Follow the instructions on the screen. Note that it will be easier to upload your images if you have stored them all in the same directory on your computer.
Before uploading your images to our website, you should have resized them so that they are no more than 800 pixels wide by 600 pixels high. (See Resizing Your Images for details of how to do this). We have imposed this restriction to help ensure that the web pages are not too slow. This is explained further in the help section on Preliminary Preparation. The images should be at least 450 pixels high, so that viewers can see enough of the detail in your work.
Once you have done this you must click <Save>
STEP 3 - Enter information and images on to your Web Pages
When entering data on to a page, click <Edit> and to view the page click <View>
- When in edit mode, to enter, or change text on a page, click on the text. A text editing screen will be displayed. Text can be bold, underlined, italics, centred and/or bullet points. You can also enter hyperlinks, to link your website to other websites. When you have finished editing click <Save> to save the changes or <Cancel> to cancel.
- When in edit mode, to enter or change an image, click on the image and you will be able to select the image you want from the images already uploaded in Step 1. If you require an image that has not been uploaded yet, then return to Step 1 in the Website Maintenance Screen and upload the image. When you have finished click <Save>
In this step you can also create your own web pages. You are
allowed to create up to 9 more gallery pages, and 3 more
standard pages.
See the section on planning your website in
Preliminary Preparation.
STEP 4 – Publish your website
Any
changes you make to your website are initially only made to a
temporary copy (here on the Websites for Artists website). Once
you're happy with them you can 'publish' them i.e. transfer them
to your own website.
You can publish your website as often as you like, but it is
more efficient to group the changes so you do not have to
publish it too often.
* text that is underlined is explained in
the Glossary